virtualenv, isolated Python environment for developer dilemmas.
Virtual environment generally refers to self defined instances of software.
Installing packages in Python requires system privileges and leaves the system Python installation altered. All this may lead to unintentional upgrade of an application and thereby causing dependency issues and errors.
Developers need not suffer this situation anymore. All we need to do is install one Python package system-wide, and we call it "virtualenv".
Once virtualenv is installed, you have the power to create any number of small, self-contained “virtual Python environments” where packages can be installed and uninstalled and with which you can experiment, all without contaminating your system-wide Python. When a particular project or experiment is over, you simply remove its virtual environment directory, and your system is clean.
This eliminates the common developer dilemma - Project X requires version 1.x.x but Project Y requires 4.x.x .
virtualenv is a tool to create isolated Python environments. virtualenv creates a folder which contains all the necessary executable to use the packages that a Python project would need.
Firstly, Install virtualenv via pip:
$ sudo pip install virtualenv
After the previous step, Test your installation
$ virtualenv --version
Basic Usage
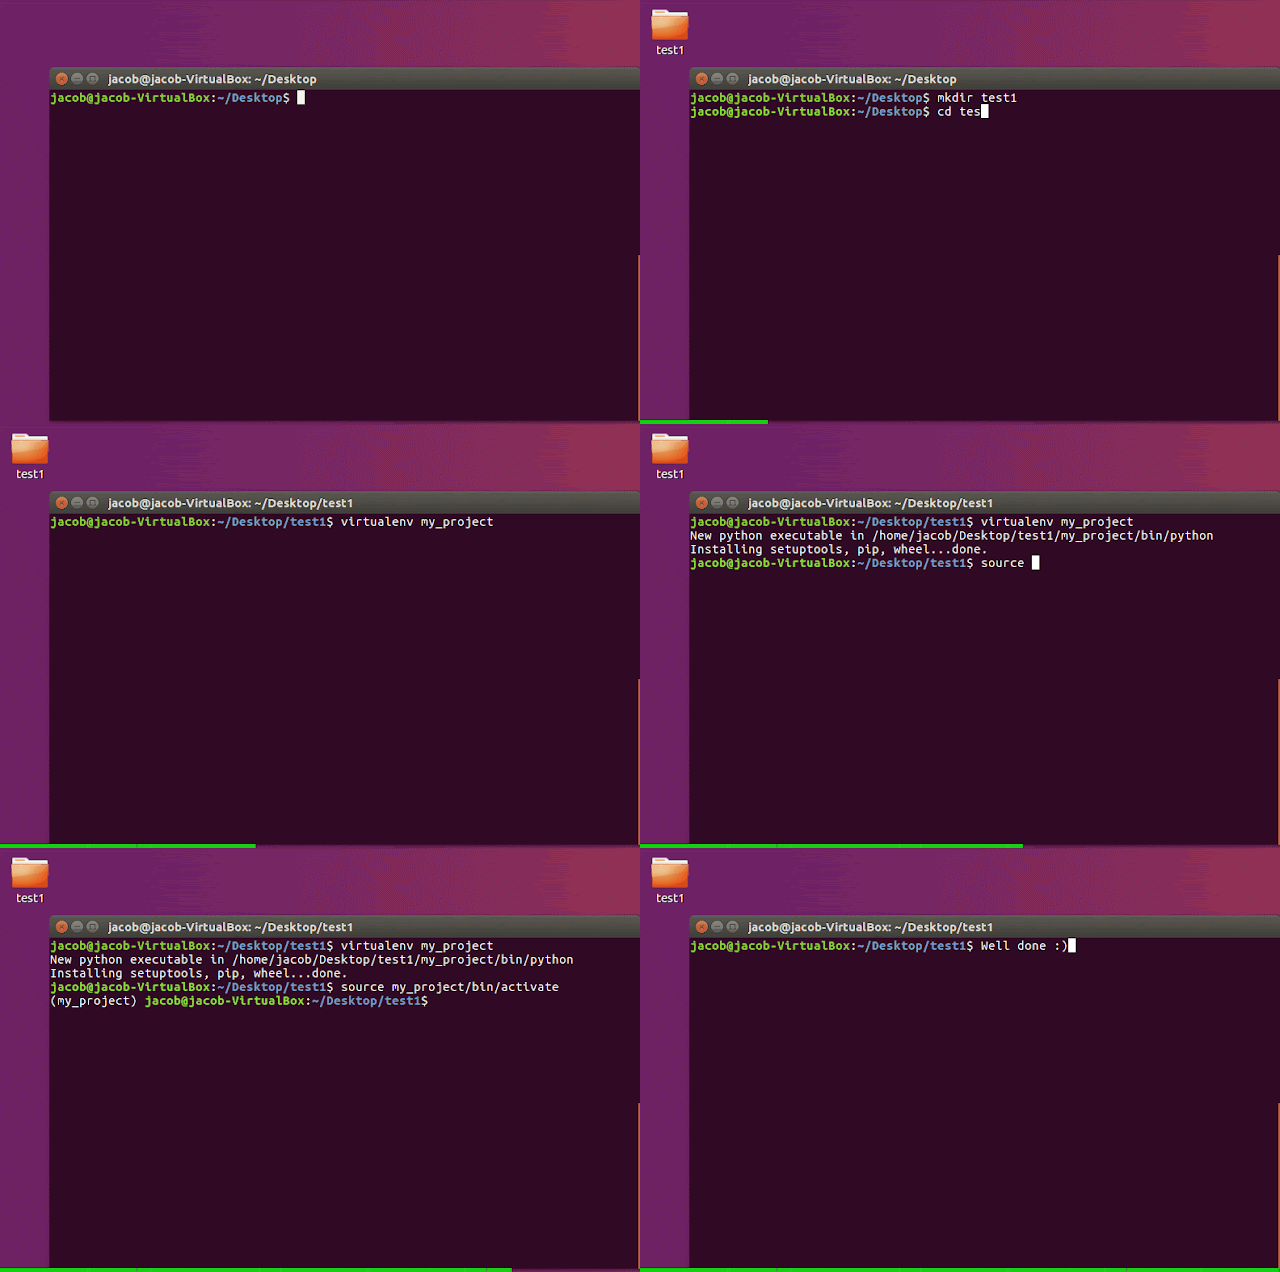
Create a virtual environment for a project "test1" and change directory:
1. $ cd test1
2. $ virtualenv my_project
"virtualenv my_project" will create a folder in the current directory which will contain the Python executable files, and a copy of the pip library which you can use to install other packages. The name of the virtual environment (in this case, it was my_project) can be anything; omitting the name will place the files in the current directory instead.
This creates a copy of Python in whichever directory you ran the command in, placing it in a folder named my_project.
Example :
You can also use the Python interpreter of your choice (like python2.7).
1. $ virtualenv -p /usr/bin/python2.7
To enter the virtual environment that you created above you need to follow the command below,
$ source my_project/bin/activate
To come out of the virtual environment just type "deactivate" and you will be done with it.
$ deactivate
You can have a thorough understanding of the steps by following the following GIF.
“ It's not at all important to get it right the first time. It's vitally important to get it right the last time. ” - Andrew Hunt and David Thomas


